Linuxのディストリビューション、Red Hat Enterprise Linux 10.0で、Splunk Enterprise 10.2.0を使う方法をまとめました。
RHEL10にSplunkをインストールする
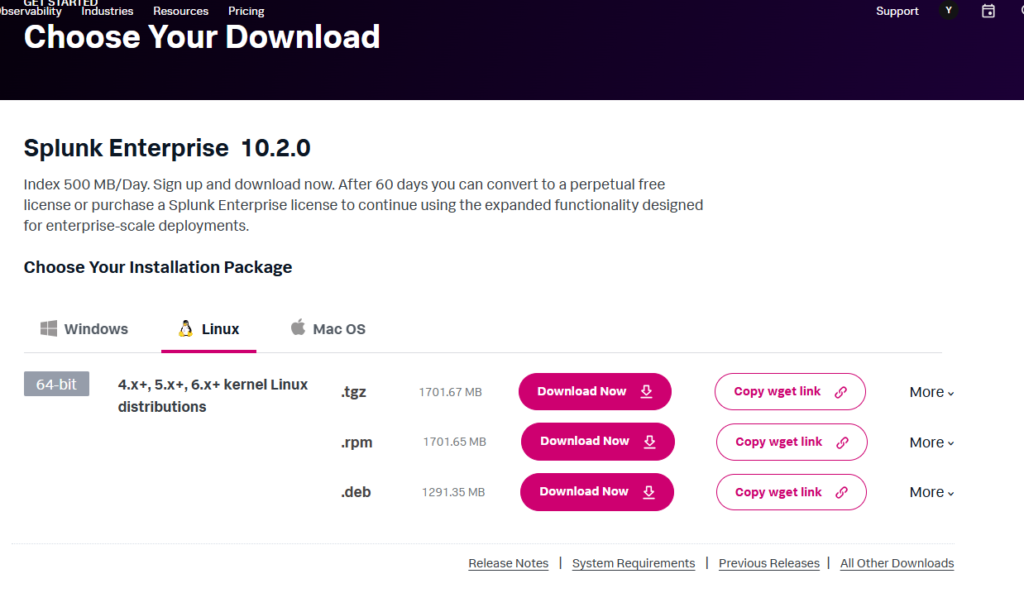
まずは以下のSplunk公式サイトからSplunkをインストールするためのrpmパッケージをダウンロードします。

Free Splunk Trial | Download Splunk Enterprise Free for 60 Days | Splunk
Try Splunk Enterprise free for 60 days as a hybrid or on-prem download. Stream, collect and index any type of data safel...
www.splunk.com
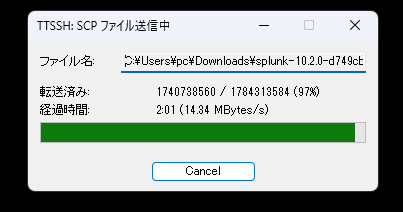
WindowsのパソコンでダウンロードしたrpmファイルをRHEL10.0へTera Termで送信して実行します。
Linux(RHEL10.0)に転送したファイルをrpmコマンドでインストールします。
# rpm -ivh splunk-10.2.0-d749cb17ea65.x86_64.rpm[root@RHEL100 tmp]# rpm -ivh splunk-10.2.0-d749cb17ea65.x86_64.rpm
警告: splunk-10.2.0-d749cb17ea65.x86_64.rpm: ヘッダー V4 RSA/SHA256 Signature、鍵 ID b3cd4420: NOKEY
検証しています... ################################# [100%]
準備しています... ################################# [100%]
verify that this sytem has all the commands we will require to perform the preflight step
no need to run the splunk-preinstall upgrade check
更新中 / インストール中...
1:splunk-10.2.0-d749cb17ea65 ################################# [100%]
find: ‘/opt/splunk/lib/python3.7/site-packages’: そのようなファイルやディレクトリはありません
complete
[root@RHEL100 tmp]#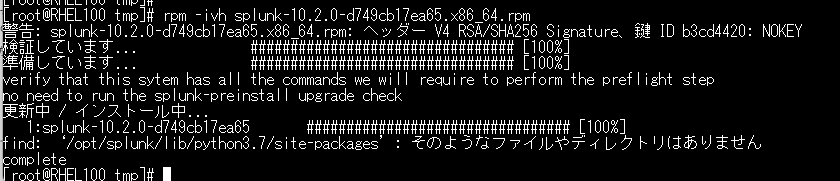
以下のコマンドを実行します。
# /opt/splunk/bin/splunk start --accept-license–run-as-rootオプションを付けるよう表示が出たため、そのオプションもつけてコマンドを実行します。
[root@RHEL100 ~]# /opt/splunk/bin/splunk start --accept-license
Running Splunk Enterprise as root is deprecated and will be removed in a future release. For details, see the Release Notes. To run as root, use the --run-as-root option.
–run-as-rootオプションを追加して実行した例は以下です。このコマンド実行時に、あとでSplunkへログインするユーザーとパスワードを設定します。
[root@RHEL100 ~]# /opt/splunk/bin/splunk start --accept-license --run-as-root

This appears to be your first time running this version of Splunk.

Splunk software must create an administrator account during startup. Otherwise, you cannot log in.
Create credentials for the administrator account.
Characters do not appear on the screen when you type in credentials.

Please enter an administrator username: admin
Password must contain at least:
   * 8 total printable ASCII character(s).
Please enter a new password:
Please confirm new password:
Copying '/opt/splunk/etc/openldap/ldap.conf.default' to '/opt/splunk/etc/openldap/ldap.conf'.
writing RSA key

writing RSA key

Moving '/opt/splunk/share/splunk/search_mrsparkle/modules.new' to '/opt/splunk/share/splunk/search_mrsparkle/modules'.

Splunk> The IT Search Engine.

Checking prerequisites...
        Checking http port [8000]: open
        Checking mgmt port [8089]: open
        Checking appserver port [127.0.0.1:8065]: open
        Checking kvstore port [8191]: open
        Checking configuration... Done.
                Creating: /opt/splunk/var/lib/splunk
                Creating: /opt/splunk/var/run/splunk/appserver/i18n
                Creating: /opt/splunk/var/run/splunk/appserver/modules/static/css
                Creating: /opt/splunk/var/run/splunk/upload
                Creating: /opt/splunk/var/run/splunk/search_telemetry
                Creating: /opt/splunk/var/run/splunk/search_log
                Creating: /opt/splunk/var/spool/splunk
                Creating: /opt/splunk/var/spool/dirmoncache
                Creating: /opt/splunk/var/lib/splunk/authDb
                Creating: /opt/splunk/var/lib/splunk/hashDb
                Creating: /opt/splunk/var/run/splunk/collect
                Creating: /opt/splunk/var/run/splunk/sessions
New certs have been generated in '/opt/splunk/etc/auth'.
New certs have been generated in '/opt/splunk/etc/auth'.
        Checking critical directories...        Done
        Checking indexes...
                Validated: _audit _configtracker _dm_summary _dsappevent _dsclient _dsphonehome _internal _introspection _metrics _metrics_rollup _telemetry _thefishbucket history main summary
        Done
        Checking filesystem compatibility...  Done
        Checking conf files for problems...
        Done
        Checking default conf files for edits...
        Validating installed files against hashes from '/opt/splunk/splunk-10.2.0-d749cb17ea65-linux-amd64-manifest'
        All installed files intact.
        Done
All preliminary checks passed.

Starting splunk server daemon (splunkd)...
Using configuration from /opt/splunk/share/openssl3/openssl.cnf
.....+...+.....+......+....+..+.......+...+........+++++++++++++++++++++++++++++++++++++++++++++++++++++++++++++++++*...+.............+.........+.....................+..+..........+...+.....+...+.+++++++++++++++++++++++++++++++++++++++++++++++++++++++++++++++++*...+..................+...+..+................+.....+......+....+..+...+......+......+...+......+.............+...+.....+....+.....+....+............+.....+...+.+.........+......+........+......+.+.....+.+........+.......+...+..+.......+...+..+.....................+....+...+........+..........+...........+......+....+.....+.+............+......+.....+....+..+.............+..+...+...+...+....+.....+...+...+....+...+...+.....+......+....+.....+.+...+...+.....+....+.....+.+...+...........+...+..........+........+....+........+..........+...+...+...........+...+.+.....+....+...+..+......+...................+...+..+............+...+.+..+..........+...+.....+.+......+..+............+.+...+......+...+...........+.+....................+......+....+.....+...+.+.....+................+......+..+...............+......+.+.....+.........+++++++++++++++++++++++++++++++++++++++++++++++++++++++++++++++++
....+......+.....+.........+.+++++++++++++++++++++++++++++++++++++++++++++++++++++++++++++++++*.....+.+..+.............+...+.....+.........+......+.+......+...+..+.......+..+++++++++++++++++++++++++++++++++++++++++++++++++++++++++++++++++*.....+..+.+...+.....+....+..+......+....+...............+......+.....+..................+......+...+............+......+.......+...+...+.....+...................+........+....+++++++++++++++++++++++++++++++++++++++++++++++++++++++++++++++++
Warning: ignoring -extensions option without -extfile
Certificate request self-signature ok
subject=CN = RHEL100, O = SplunkUser
Done


Waiting for web server at http://127.0.0.1:8000 to be available...................... Done


If you get stuck, we're here to help.
Look for answers here: http://docs.splunk.com

The Splunk web interface is at http://RHEL100:8000

[root@RHEL100 ~]#
firewalldでポート番号8000を許可します。
[root@RHEL100 ~]# firewall-cmd --add-port=8000/tcp --zone=public --permanent
success
[root@RHEL100 ~]# firewall-cmd --add-port=8000/udp --zone=public --permanent
success
[root@RHEL100 ~]# firewall-cmd --reload
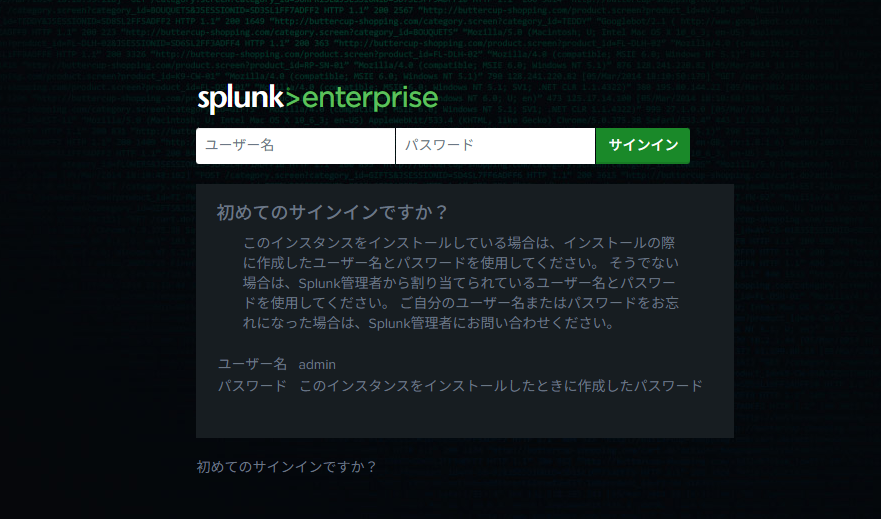
successブラウザからhttp://<今回設定したLinuxのSplnkサーバーのIPアドレス>:8000にアクセスします。以下の画面が表示されたら、/opt/splunk/bin/splunk start –accept-license –run-as-rootコマンド実行時に作成したユーザーとパスワードでログインします。
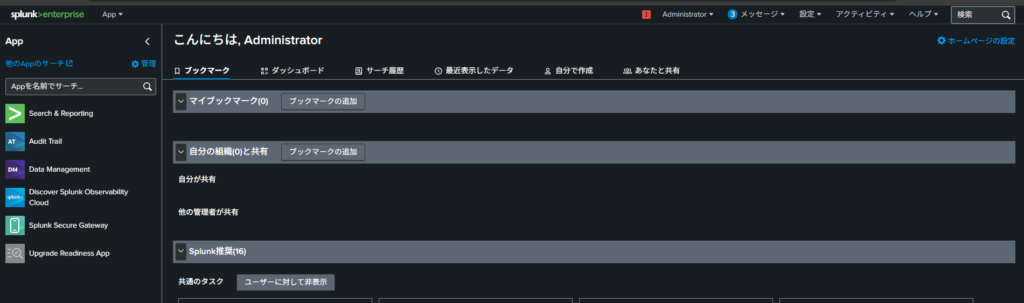
ログインすると以下の画面に遷移します。